Hiking is an activity that relies far more on your lower body than your upper body. Well, unless you’re scrambling, that is. What exactly is scrambling in hiking?
Scrambling is a hiking activity that entails climbing up steep hills and terrain primarily with your hands but also with your feet. It combines elements of rock climbing, mountaineering, hillwalking, and hiking all in one.
If you haven’t yet heard of scrambling or you’re only passively familiar and eager to learn more, you’re not going to want to miss this one. We’ll define scrambling, discuss its degree of difficulty, and offer tips to help you start scrambling.
What Is Scrambling?
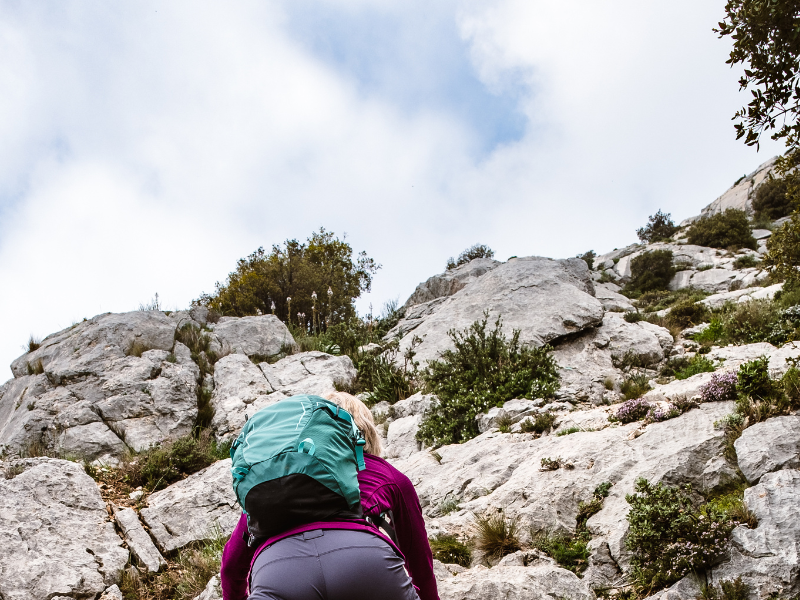
Known also as rock scrambling, scrambling is an activity reserved for rocky, steep, and rough terrain only. When you scramble, you ascend the terrain using mostly your hands for leverage but your feet as well.
Despite that it’s a hiking activity, scrambling is nothing like hiking itself. And certainly even less like trekking. The primary difference is speed - you’re not moving at a swift and vigorous pace scrambling as you are when on a hike.
Rather, scrambling is about moving in a crawl-like fashion. As you do, you’ll rely on your knees and elbows for leverage and balance.
To you, this might sound a lot like rock climbing, but scrambling is indeed different. Rock climbing requires more of a pulling motion with your arms whereas scrambling is about balancing while ascending. You will have to use your arms to pull up, of course, but there’s more to it than that.
Not to scare you, but scrambling doesn’t involve wearing a harness like rock climbing so often does. The only exception would be harder-rated scrambling excursions, which you'll learn all about in the next section.
After all, scrambling does incorporate elements of rock climbing just as it does mountaineering, hillwalking, and hiking, per what we mentioned in the intro.
Scrambling while on a hike is a great way to work your upper body more than you do when hiking alone.
Even if you’re carrying a trekking pole or swinging your arms on a hike to burn extra calories, those activities can't compare to the way you work your upper half when scrambling.
How Hard Is Scrambling?
Scrambling can be extremely challenging, but much like bouldering and climbing, there are different difficulty levels. In the United States, the scrambling difficulty is rated according to class. Class 1 is the least difficult and Class 5 is the most difficult. In the UK however, difficult is split into four difficulties.
Let’s go over the five grades or classes so you can fully grasp how the difficulty of scrambling increases.
Class 1 Scrambling
Ideal for beginners, Class 1 scrambling is the easiest type of scrambling. You’re not climbing so much as you are taking a walk along steep terrain.
If you have hiking experience, it’s easy enough to transition from hiking to scrambling at Class 1 levels.
You can use your hands for balance and stabilization or even hiking poles if you wish. You still have to be relatively fit and have good strength and stamina to handle Class 1 scrambling, but it’s not a rigorous activity at all.
However, in Class 1, the risk of injury is quite low. You’re not ascending overly steep hills, so if you were to fall and hurt yourself, you’d end up with lacerations and bruises and maybe a bone fracture or two. You wouldn’t have any broken bones.
Class 2 Scrambling
As you might expect, upgrading to Class 2 scrambling does raise the difficulty a notch, but not significantly.
By the time you graduate to Class 2, scrambling is less about hiking and more about using your hands as you’re supposed to when engaging in this activity.
For instance, you’ll rely on your hands more for balance, certainly to a higher degree than you did when Class 1 scrambling. That said, all the holds on your route are plenty stable and usually quite sizable as well to minimize your risk.
You need good conditioning, body strength, and stamina to succeed. If you haven't dug into Kenver's 6 tips on getting your body ready for hiking and scrambling, now's probably a good time to do so.
You’ll want to try to minimize your fall risks as much as you can, as broken bones are a higher possibility in Class 2.
Class 3 Scrambling
The next degree of difficulty is the Class 3 scramble. The terrain is more difficult still, and the scrambling is usually longer, requiring even more upper (and lower) body strength and conditioning than Class 2. This starts to test strength and endurance.
It’s recommended that you scramble for a while at Class 2 levels before upgrading to Class 3 scrambles, going on at least five scrambles at a Class 2 difficulty.
The terrain is even more arduous on a Class 3 scramble. The footholds aren’t nearly as large as they once were, the routes are less defined, and the rocks aren’t as secure.
If you have prior rock climbing experience, that will make transitioning into Class 3 scrambling easier. Indoor rock climbing or bouldering experience will be beneficial, although obviously, outdoor rock climbing experience is preferable here.
The primary benefit of bouldering or indoor climbing experience will come from knowing how to shift your weight while on a hold. For instance, if you need to reach with your hand in one direction, kicking your leg out for reach and acting as a counter-balance.
While this won't be the typical requirement of an entire Class 3, a certain level of climbing experience in weight distribution and holds will come in handy.
You’re at least 40 feet up when you’re scrambling at Class 3 difficulty, and remember, you probably won’t wear a harness, either. You must be extremely confident in yourself and comfortable with heights.
If you were to fall, the consequences in Class 3 would be very serious. You can imagine what could happen if you took a fall from 40 feet with no harness. Yes, it's that serious.
Class 4 Scrambling
It doesn’t get much more difficult than Class 4 scrambling. At this level, the amount of exposed terrain is more plentiful, and the rocks are not always of high quality. They could become dislodged, forcing you to change your tactics and reroute on the fly, so you can achieve higher stability.
This is more like solo rock climbing than anything else but still counts as scrambling.
You need to have scrambled for years and completed many arduous treks before you should ever consider yourself ready for Class 4 scrambling.
Class 5 Scrambling
No form of scrambling is more dangerous than Class 5 scrambling. This is the closest you’ll get to rock climbing without actually doing it as you ascend vertical cliffs.
You’ll have to be an expert at finding routes or carving out routes that may not exist. You also need more equipment such as boots, a helmet, and yes, even a harness - while much of this is needed even in Class 3, and even more in Class 4, it's mandatory for you in Class 5.
Most importantly, you need nerves of steel.
Heights cannot phase you, nor can rock tumbling down hundreds of feet below your boots.
Making one error can be fatal, so Class 5 scrambling is not something to rush into by any means.
Some scramblers spend four or five years doing Class 2 or Class 3 scrambles before they graduate to Class 4 and then Class 5 scrambles. Others never go on a Class 5 scramble because of the inherent risk.
If you’re a hiker by nature, that means that you own plenty of hiking boots. And if you're starting to explore scrambling, you might wonder if that means having to buy all-new shoes.
Can You Scramble in Hiking Boots?
Hiking boots are fine for most scrambling expeditions, but they must go over your ankle.
Your hiking boots should be stiff and feature steel toe protection so that if you bump into or accidentally kick a rock when scrambling, you won’t end up losing your balance and potentially breaking your foot.
Stiff hiking boots will also enable you to keep your balance as you begin exploring increasingly steeper slopes and terrain.
Your boots needn’t be too thick or bulky. Although scrambling clubs that offer field trips do not allow lightweight hiking boots, a good midweight pair is the next best thing.
You’ll be able to feel the footholds with your feet so that you can deftly navigate the trail.
7 Scrambling Tips For Beginners
To wrap up, we’ve compiled this handy list of scrambling tips and best practices so you can have a fun, safe, and adventurous outing.
1. Buy Grippy Gloves
Given how often you use your hands when scrambling, the thought of doing it bare-handed is unfathomable. Unlike bouldering, where you typically grunt through it or wrap some tape around your hand, wearing gloves in scrambling is expected.
In an hour or less, your hands will be cut, scraped, and possibly bruised. You need gloves when scrambling.
Look for gloves that have an optimal level of grip so that with each handful of rock you grasp, you feel like you won’t slip.
It’s best if your gloves offer UV protection as well. Although most people don’t think of protecting their hands from the sunlight when hiking or climbing, this is one of those spots that get a ton of sun exposure but is often overlooked.
2. Practice Rock Climbing First
Rock climbing experience translates very well into scrambling. If you have zero rock climbing experience and you’re interested in getting into scrambling, then take a couple of rock climbing courses.
Then go on a few outdoor rock climbing expeditions with friends or guides until you can strengthen your body and learn your way around climbing walls.
If that's a difficult activity to find in your area, look for bouldering gyms. These gyms rarely go above 20 feet, will offer a ton of different problems (routes), and provide you with a cushy fall as you get your reps in.
3. Avoid Vegetation as Handholds
Although vegetation might seem like it's rooted well, and often more of a cushioned hold than a jagged rocket, this is a quick way to end your scrambling trip.
Grass, shrubs, and roots can easily rip if you apply too much pressure on them, especially if the vegetation is wet.
You’re better off reaching around vegetation or gripping it for only a very short time when scrambling.
4. Always Maintain Three Points of Contact
You always want either both feet and one hand or both hands and one foot firmly planted whenever scrambling. The only time you should even have three points of contact is when you're actively moving a limb to a new hold.
This isn’t a movie, so there’s no need to try dangling dramatically from a cliff, or rock a dyno like you're in Mission Impossible.
5. Test Your Footholds and Handholds
Before you confidently step onto a foothold or grip a handhold, try testing it first. Simply apply a bit of your body weight onto the hold and see how well it holds up.
If the hold feels loose or even actively crumbles before your eyes, then you need to find another hold immediately.
This can seem obvious when reading about it, but when you're scrambling, adrenaline is pumping and sometimes the basics are easy to forget about. This is one of those basics that you need to drill into your mind.
Again, bouldering and climbing experience will go a long way in making this practice second nature.
6. Take Your Time
Scrambling is not a race or a competition. It’s about having fun and enjoying the experience as you do it. Rushing can lead to foolhardy decisions. Remember falling 10 feet can hurt, falling 20 feet or greater can hurt permanently.
7. Prepare Like You Would A Hike
Scrambling can just as easily be a leg of your hike as it would the entire activity itself. Depending on the class, which if you're a beginner you would hopefully begin in Class 1, you'll want to carry with you at least the same gear you would hiking.
Even if you're just going out for a day hike and this scramble is part of the trail, it's best to prepare for the day by following a packing list.
Other items to consider, contingent on the difficulty of the class, include a helmet, climbing shoes, harness, and of course the gloves from the first tip.
Scrambling Is Hiking for Climbers
Now you know, scrambling in hiking is a type of upper-body climbing that’s akin to climbing or bouldering, but at lower class levels, behaves more of a hybrid between climbing and hiking.
With five degrees of difficulty, beginners and seasoned experts alike can enjoy scrambling.
Since scrambling minimizes the use of equipment, it can be dangerous. Remember to always take your time and only attempt scrambling at a difficulty level that you’re comfortable with.


