A Beginner's Guide On How to Clean Hiking Boots
Inevitably, your hiking boots are going to get dirty, especially since you’re an avid hiker. The problem is, you're not exactly sure what the best method is for removing dirt and grime from your boots. If you're wondering how to keep your boots in tip-top shape, you'll need the right tools and steps to get the job done.
Using only boot cleaners and a boot brush, here's the general idea of how to clean hiking boots:
- Remove the insoles of your hiking boots
- Remove the laces from your boots
- Brush the mud off your boots
- Soak your boots in a filled water basin (or kitchen sink) for 5-10 minutes
- Brush and wipe any grime or debris from the boots
- Hand-dry your boots with a rag or towel
- Allow the boots to completely dry in non-humid conditions for 24 hours
While that's only 7 simple steps for like-new boots, it's just a general process - there are quite a few variables that impact how you clean your hiking boots, such as cleaning uppers vs. outsoles or mesh vs. leather hiking boots. This guide will take you through every step so you can restore your hiking boots!
In case you're on the fence about whether you actually need to clean your boots or not, this next section will show you why it's important.
3 Reasons You Should Clean Your Hiking Boots
Is it really the worst thing in the world if you don’t clean your hiking boots? They’re still in usable shape, after all. They just don’t look that good.
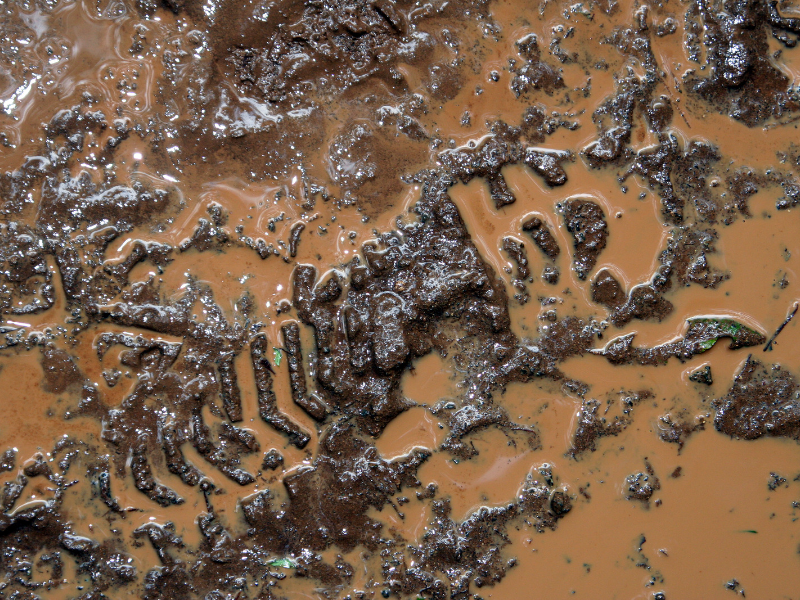
You need to clean hiking boots because mud, dirt, and debris can dry out materials that keep hiking boots intact. Neglecting proper hiking boot maintenance will degrade the integrity of the uppers, outsoles, and even your traction. This means replacing your boots sooner or opening yourself to injury.
Even if you’re the busiest hiker on the planet, it’s worth taking some spare time out of your day to clean your boots. Here’s why:
1. Mud Dries Some Boot Materials
Mud eventually dries and as it does, it pulls away moisture from any surface it’s on. If that happens to be leather hiking boots especially, then you can accidentally accelerate their decline.
The boots will age faster as their pliability lessens each time the leather gets caked in dirt and mud.
2. Dirt and Grit Degrade the Uppers
Dirt isn’t only detrimental in that it ages leather. When it’s dried, it has a texture like sandpaper, as do other grime and grit that can settle on your hiking boots. The sandpaper-like texture begins to strip away the upper material.
As it weakens, it’s more prone to holes, tears, and other unappealing damage. You may find that you have to replace your hiking boots a lot more frequently! And nobody likes to spend money when they don't have to.
3. You Might Lack Traction
If dirt and grime have coated the uppers of your boots, then it’s likely underneath the boots as well. Hiking boots that are housing large chunks of dirt or even small stones lodged between the treads no longer provide traction.
This is a massive risk to your safety as you climb a trail - anything that degrades traction is putting your safety at risk.
How to Clean Your Hiking Boots - Uppers, Outsoles, and Leather Hiking Boots
Now that you see the value of cleaning your hiking boots, you’re ready to get started.
Without further ado, let’s go over the cleaning steps, beginning with the hiking boot uppers and then delving into how to clean the outsole and leather hiking boots separately.
How to Clean Hiking Boot Uppers in 7 Steps
Most hiking boot uppers are made of synthetic fabrics or meshes. If that’s the case for your boots, then keep reading. For those with leather hiking boots, jump ahead to the next section.
You’ll need a specialized boot brush, a scrub brush, and a boot cleaner for heavy-duty stains. It’s also good to have some white vinegar on hand as well for mold removal.
Next, follow these steps:
Step 1 – Take Out the Boot Laces
- The laces get in the way of cleaning your boots, preventing you from reaching the eyelets, which do indeed get dirty too.
We recommend cleaning the laces separately - odds are good that if your boots are dirty, then your laces are as well.
Step 2 – Brush Off Surface-Level Dirt
- With your boot brush, gently sweep off any dry surface dirt from the uppers.
Your technique here is important. Brushing too forcefully will lodge the dirt deeper into the boots, creating more work for yourself to remove it.
If you absolutely cannot find a boot brush, then you can always use a clean, dry toothbrush instead - one that you can toss in the trash afterward.
Step 3 – Wash the Upper
For stubborn dirt and other caked-on messes, you’ll need more than a boot brush. It’s time to clean the boots using running water and some cleaning products. While you can use your kitchen sink for this job, for sanitary purposes, any other sink you have available might be better, such as a basement sink or an outdoor sink.
There are two methods you can use here, depending on the materials of your boots; soaking your boots entirely or wetting your boots under running water.
You can soak synthetic hiking boots in a basin or sink if you wish, but only if they’re waterproof. If they’re only water-resistant, then being saturated to such a degree could ruin your boots.
Here's how you do both options:
Submerging Your Hiking Boots in Water:
- Fill water basin
- Add boot cleaner or mild dish soap to the water
- Let the boots soak for 5-10 minutes
- Empty basin and boots of water
- Use a handheld scrub brush to work the cleaner into the uppers - rub in a circular motion
- Scrub the fronts, sides, and back of the upper on both boots
- Repeat soaking and scrubbing if no noticeable difference
Wetting Your Hiking Boots with Water:
- Turn the water on
- Run the boots under the water just to wet them - don't soak them
- Apply the recommended amount of boot cleaner to the boots (read the back of the product for exact amounts per brand)
- Use a handheld scrub brush to work the cleaner into the uppers - rub in a circular motion
- Scrub the fronts, sides, and back of the upper on both boots
Nobody likes to read instructions - we get it. But nobody likes buying new boots when you could have avoided it even more. So please read the boot cleaner instructions.
While many upper materials are compatible with boot cleaners, not all necessarily are. The cleaner could damage the uppers in that case!
Step 4 – Rinse Off the Boots
Next, you need all that boot cleaner residue off your hiking boots.
- If you soaked your synthetic boots: you can dump that water, replace it with clean water, and give the boots a few minutes to soak until all the residue comes out.
- If you ran your synthetic boots under running water: hold the boots under the running water until the upper material no longer comes out sudsy.
Step 5 – Treat Mold
Mold thrives in moist, humid environments. You’re far likelier to see it inside a pair of hiking boots than on the exterior but never say never. Distilled white vinegar is powerful enough to prevent mold here, but you want to be extra cautious with it. Be sure to dilute the vinegar with water.
- Spot-test the vinegar solution to make sure it doesn't stain or mar the fabric - choose a small and hardly visible place for the experiment
- Next, treat the moldy areas of the boots with distilled vinegar
- Use clean water to rinse away the distilled white vinegar residue
Step 6 [Bonus Step] – Waterproof Your Boots
If your hiking boots are only water-resistant, then it’s worth waterproofing them. The boots will have a higher degree of water resistance so you can splash around in puddles or get caught in the rain without worry.
The best time to waterproof your boots is when they’re damp, so you might as well do it now if you’re interested. Of course, if your hiking boots are already waterproof, then skip this step.
You’ll need a waterproofing agent or wax. We’d suggest wax for leather boots made of smooth hide and a spray-on waterproofing agent for nubuck leather as well as synthetic fabric and suede.
- Follow the product instructions and ensure your boots are wet the entire time or the treatment will not work properly.
Step 7 – Allow the Boots to Dry
Whether you waterproofed your hiking boots or not, they still have to dry. Allow that to happen in a room-temperature environment without high humidity.
While a fan is suitable for drying wet hiking boots, avoid heat sources such as hairdryers and especially your clothes dryer. Your boots could end up ruined.
How to Clean Hiking Boot Outsoles in 3 Steps
If you dunked your hiking boots in a basin, then you might have cleaned both the outsoles and the uppers in one fell swoop. If so, congrats! You’re finished.
Should you find some residual dirt that doesn’t want to come off, don’t fret. You’ll once again need your scrub brush and boot brush, but this part of the process isn’t complicated.
Just follow these 3 steps:
Step 1 – Brush Off Loose Surface Dirt
If you didn’t dislodge all the surface dirt by cleaning the uppers, then the outsole will still look a little worse for wear. Once again, your boot brush comes in handy for dislodging loose, dry dirt.
A boot brush is also very useful for knocking loose small stones and pebbles between the treads of your boots. If your boots are muddy, and not covered in dry dirt, then skip the boot brush. It won’t help.
Step 2 – Wet and Clean the Outsoles
For removing mud, you’ll need a running source of water. Your tap works just fine. A garden hose can also clean mud and other stains from your hiking boot outsoles.
You can also apply some mild dish soap and scour the affected areas with a scrubbing brush.
Step 3 – Allow the Boots to Dry
Place your hiking boots near a fan so they can dry when you’re finished cleaning. Remember, avoid heat sources when drying your hiking boots.
How to Clean Leather Hiking Boot Uppers in 5 Steps
Do you own a pricy pair of leather hiking boots? If so, then while a lot of the cleaning instructions from the last section apply, there are some differences. These steps will help you renew your leather hiking boots once more, ensuring many more trails are in the future.
Step 1 – Take Out the Insoles and Laces
Just as you did when cleaning synthetic hiking boots, you don’t want to keep the laces attached to your leather boots. You can put them in a basin of soapy water to restore their luster.
- If your boots have removable insoles, then take those out next
- You can use mild dish soap and warm water to clean the insoles
Step 2 – Brush Off the Surface Dirt
A soft-bristled boot brush will dust off the dirt and grime from your hiking boots without scratching or otherwise damaging the quality of the leather.
- Use the brush for both the uppers and the outsole
Step 3 – Clean the Leather Uppers
Never plunk a pair of leather hiking boots in a sink or basin. Only wet the areas that need to be cleaned and wet them just enough that they’re moist but not soaking.
One tip for cleaning leather hiking boots is to place an old dish towel around whatever parts of the boots you want dry when cleaning. For instance, if you only wanted to clean the outsoles, then you’d cover the uppers in a towel or two.
You might be able to use the same boot cleaner you would for synthetic hiking boots, or you might have to go out and purchase a leather boot cleaner. Follow the product instructions, applying as much as is recommended. Do not use a scrubber to work in the product but a soft microfiber cloth instead.
Step 4 – Clean Inside the Boots
If the interiors of your leather hiking boots are dirty:
- Moisten a microfiber cloth or a sponge
- Wipe down the insides
Step 5 – Let the Boots Dry
Take some old newspaper or towels and stuff your leather hiking boots with ‘em to encourage the drying process.
Allow the boots to dry in a room-temperature environment with no direct sun exposure.
Do not use heat sources such as a radiator, space heater, or hairdryer. A fan is allowable.
How Often to Clean Your Hiking Boots
Your hiking boots are looking rather clean and almost as good as new now - so congratulations on that! Now that you’re restored their pristine quality, how often do you need to clean your boots?
Ideally, to prevent damage from grime, you should clean your hiking boots after each use. Even if you’re too tired to clean them that same day, make it a point to do it tomorrow or before the next time you go on a hike.
When to Replace Hiking Boots - 5 Clear Signs to Know
If you’ve admittedly fallen behind with how often you clean your hiking boots, then even a deep cleaning might not have made them look as fresh and new as you were hoping for. Now you’re at a crossroads. You can continue using the dirty hiking boots, knowing full well that they’re degrading in quality each time you do, or you can replace them.
Here are 5 signs that it’s time to replace your dirty old hiking boots:
1. You’ve Hiked More Than 1,000 Miles
If you hike about 10 miles per week, then within 500 miles, it’s time to start thinking about buying new hiking boots. By the time you reach the 1,000-mile mark, your boots are probably in desperate need of a replacement.
More expensive hiking boots might outlast 1,000 miles but likely won’t make it another 1,000 miles from there.
2. Wearing Them Is Painful
You’ve long since broken in your hiking boots, and your feet haven’t changed in any way that would impact the fit, yet your boots still hurt when you wear them. Between the various components breaking down from time and use, it’s no surprise that your shoes aren’t as supportive as they once were.
The pain you feel now will only worsen the longer you hold onto your hiking boots.
3. The Boots Are Falling Apart
Loose stitching in the uppers, holes in the synthetic fabric, and ragged laces: all are signs that your hiking boots are long since past their prime.
Ignoring these small issues will only cause them to worsen. The upper of one boot could separate in the middle of a hike, which would put a real damper on your day.
4. The Outsoles Are Worn to Nothing
Unless you’re wearing barefoot shoes, then your outsoles are supposed to be thick and supportive.
When you’ve hiked so long in the same boots that your outsoles are thin, and especially once the treads underneath your boots are gone, you shouldn't continue hiking in them.
Treads provide traction. Without them, you could lose your footing at any time and find yourself unable to regain your grip.
5. The Insole Is Also Practically Nonexistent
The boot’s insole provides cushioning and support. Once your insole is flatter than a pancake, you’re not getting that same kind of foot support. This can augment the pain you feel when hiking, and not only in your feet and legs, either.
You could develop hip, back, and even neck pain as your body takes the brunt of the impact with every step you take.
Clean Hiking Boots Are Happy Boots
Your hiking boots were an investment. Safeguard that investment by cleaning them after every use. Be sure to waterproof your boots at the time of cleaning to better protect them from the elements! That way you'll have many more trails with them.