Full disclosure: while I constantly work and handle snowboards, but I've never had to go through the process of building one. So if you're asking the question "How the heck do you build your own snowboard?" I recently had to ask the same thing.
There are dozens of DIY guides to snowboard construction, but they all require some sort of background knowledge about woodwork and snowboard construction to understand.
Unless you're a scratch carpenter, that's not going to work for you (or me.)
I found a workaround to this, one that anyone without woodworking experience but a keen interest in making a snowboard can use. This led me to create I wanted to create a one-stop beginners guide to this process for absolute beginners—for both of our sakes.
Before we dig into the ins and outs of building your own snowboard, you should know that it's a difficult and time-consuming process, you'll need power tools and patience. Which isn't always the greatest combination or the greatest pre-requisite for some people.
Preparation will be your best friend, and the fact that you’re reading this article means you’re already on the right track.
My goal when crafting this article was to cover every angle of this process from a beginner’s perspective.
In addition to a step-by-step guide, I have also supplied resources for you to both access necessary materials as well as to dig deeper into the fine details. Let’s get started on your new board!
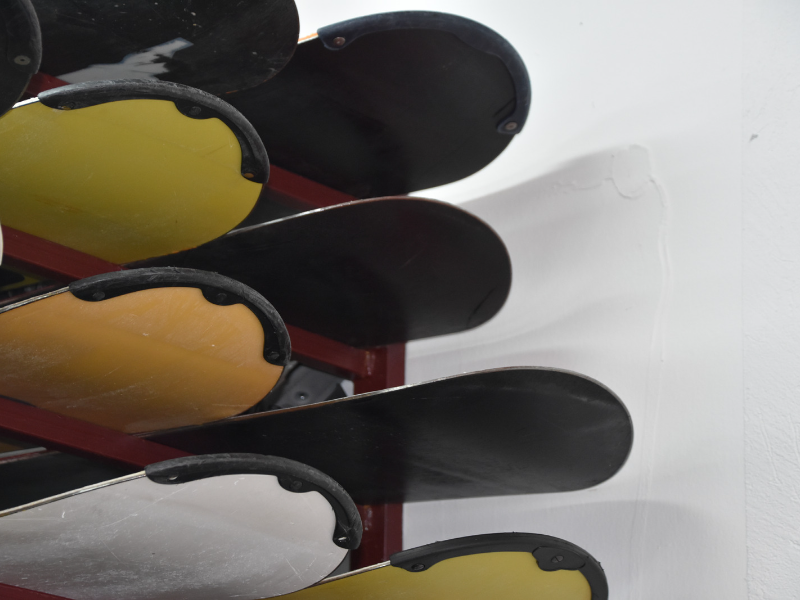
The Anatomy of a Snowboard:
Snowboards are built using a type of construction called “sandwich” construction. A snowboard has a ton of layers, and they are made by placing all of these layers on top of each other (like a sandwich) and then compressing those layers together into one solid piece.
Each of the layers of a snowboard has an important part to play in its construction.
Perhaps a bit tedious, but knowing these pieces will help you navigate the entire how-to. Let's review them now.
Base
The base is the bottom of your snowboard, the part that makes contact with the snow.
Modern snowboard bases are made from a synthetic material called Ultra-High Molecular Weight Polyethylene (UHMW-PE) more commonly referred to as P-TEX. This is essentially a super hard, tough plastic.
The powder-sized plastic pellets of this synthetic are formed into sheets of base material using one of two processes: either by sintering or extruding the material.
- Sintered Base: A sintered base is tougher, glides faster on snow, and is more expensive. Sintering is a process that combines plastic particles without melting them. This is done by compressing the P-TEX powder with massive amounts of pressure until the plastic particles interlock with each other like building blocks. These boards will last you a lot longer than extruded-base boards, but also cost more and are more difficult to repair.
- Extruded Base: Extrusion is the other way that P-TEX base material is made. Extrusion-base material gives a slower board glide, is easier to cut than sintered material, and is cheaper, often found in inexpensive mass-produced snowboards. Extrusion is done by superheating the P-TEX particles until they melt together. Extruded bases are cheaper and easier to repair than sintered bases, which is good since they aren’t as durable and will crack more often.
You might be wondering how one type of base material manufacturing can cause your board to achieve higher speeds than another. I was wondering the same thing! So I dug up the answer. Because of the way that sintered bases are made, they are more porous (lots of tiny holes) than extruded-base material, which is not porous at all. The pores in a sintered base allow the board to retain much more wax than an extruded base. As you already know, a well-waxed board is key to achieving the fastest speeds down the slopes.
Ultimately, the type of base material you purchase to build your snowboard depends on your skill level, intended use, and your eagerness to repair or rebuild your board sooner rather than later.
Depending on what type of rider you are, you may want to consider one board over the other:
- If you're a casual snowboarder or a beginner, I would recommend going for the extruded base for your board build.
- If you are competing against other riders or would consider yourself an advanced snowboarder, a sintered base would be the way to go.
Steel Edges
This edging material is mounted around the outside frame of your base material. The steel edging is what allows your board to slice cleanly through the snow.
Often steel edges have a thin strip of rubber on top of them to help the edges bond more easily to the rest of the board. Epoxy has a difficult time bonding to steel, and rubber solves that problem.
Core
Your core is what makes up the majority of your board’s construction. Cores are made of wood. Lightweight woods such as poplar or bamboo are the most popular. The thickness of your core is what defines key elements of your board such as its flexibility.
The core is thickest in the middle (around 7mm thick) and then tapers out and becomes thinner toward the ends (around 2mm.)
Oftentimes, the endings of your board can be replaced by a thicker version of your base material, allowing for even more flexibility. Doing this also protects the tips of your core material, which can become frayed and damaged over time due to constant flexing.
Inserts
Inserts are small metal screw-like bolts that are added to your core during construction. These little holes allow you to screw in your bindings, the connector pieces that act as the glue between your snowboard boots and your board.
Inserts are connected to the core from the bottom, making it impossible to pull them through as you ride because of their wide lip.
Sidewalls
Many snowboards have sidewalls. These are edge guards to protect the wood of your core from water damage.
P-TEX can be used for your sidewalls, however, this material is difficult to use during homemade board construction as it doesn’t adhere easily to the core material and can make it difficult to achieve the correct board thickness in the final construction.
More commonly used for sidewalls in home builds is hardwood, which can be easily attached with wood glue.
Topsheet
While this part of your board is not necessary, it is often included for aesthetic purposes. Popular topsheet material includes veneer or plastic. Plastic is particularly nice because you can print custom designs on the topsheet.
You can order custom plastic topsheet material from several sites.
The Press For Building a Snowboard
The press is the most important step in building a snowboard. Remember how I mentioned that building a snowboard is like making a sandwich? Well, the press is what keeps those layers of the sandwich from ever, ever coming apart again.
The layers are soaked in epoxy, an organic polymer used for binding all of the components together, and then compressed under intense pressure against a snowboard mold until they are one solid piece. There are two main ways this is accomplished:
1. Vacuum System Snowboard Pressing
This is the most common way to accomplish the press, and also the cheapest (but still high quality.)
Laying the snowboard on the mold, you simply place a sheet over the board and seal it tight with vacuum tape. Then, using a vacuum pump (which you can rent) you compress the materials against the mold with one bar of atmospheric pressure. This is equivalent to parking a car on top of it!
This is the method used for this guide on building your own snowboard.
2. Mold to Mold Snowboard Pressing
The other most common method of pressing your snowboard involves using two molds, a top, and bottom mold, and clamping the two together with your snowboard sandwich in between.
This is also relatively easy and inexpensive, but has a major downside compared to the vacuum seal: if your molds are not perfectly shaped, and have any warping or bowing at all, those parts of your snowboard sandwich will receive little to no pressure from the compression and might not bind correctly.
What is a Snowboard Mold?
A snowboard mold is made of multiple identical wooden ribs that are clamped together using a threaded rod with spacers. On top of the mold, there is a thin sheet of material to work on. Your ribs can be cut using a template from your design.
Make sure when creating your mold that you make it significantly larger than the snowboard will be, to leave room to work.
Use your router to make copies of the first rib, or cut the rest by hand if you do not have a router. Your ribs must be identical all the way across. If they aren't, use a sander or sandpaper to file them down until everything matches.
Note: if you are using a vacuum press method, do not use a spacer between your ribs!
The surface on top of the mold is typically made from a thin sheet of acrylic or metal, usually steel or aluminum.
Whatever you use for your surface material, just make sure it is not porous. If you chose to try a vacuum press, the pores in your surface material would prevent the vacuum from getting a complete suction.
The Design of Your Snowboard
Another essential component of snowboard construction is its design. Your snowboard design includes not only the silhouette of the body but also the thickness of its core and tips.
One of the easiest ways to grab a snowboard design is just to copy your design from another board. You can trace the body and copy the measurements to create a replica. This is a great option for beginners, and for those who already have a board that they love.
If you want to custom-design your board, there are several great websites out there for this exact purpose. I would recommend Prior - you can design a fully-custom board, or if you have a skier in the family, they make incredibly high-quality snow sports equipment.
Alright, time to get down to business! Let's look at what you'll need to get building your snowboard.
Materials and Tools Needed to Make a Snowboard
Before starting your snowboard creation process, make sure you have a large enough work area and you've protected any sort of surfaces to work out.
Materials for Building a Snowboard:
- Base Material
- Steel Edges
- Wooden Core
- Binding Inserts
- Fiberglass Sheets
- Epoxy
- Template and Fixture Wood
- Topsheet (not required)
Tools for Building a Snowboard:
- Jigsaw
- Sandpaper
- Drill
- Ruler and Calipers
- Router (not necessary but will make your life so much easier)
- Press System (either vacuum or mold to mold)
How to Build a Snowboard: Step by Step
You've got the background, the general process, the glossary for terms, and you've gathered all the materials and tools needed - it's finally here. Time to build a snowboard!
Remember, this is a challenging build and takes time, so if you've only got 20 minutes to spare, it's best to reschedule this for another day.
You'll build this over days as well, so you'll want to make sure you set up in a location that doesn't get interfered with.
Step 1: Build the Base
Building the base is the first step in your snowboard construction.
- From your design, print out your template. You can do this either on a large printer with one large piece of paper or on a regular printer with many smaller pieces of paper taped together. Just make sure that if you are doing the latter, you have your printer scale set to 100%.
- Make sure you lay your sheet of base material on a flat surface so it can settle.
- Double-check to see if your base material was flame treated. This is normally done by the supplier, so check their website to make sure. Flame treating is a process in which the P-TEX is quickly doused in the fire which slightly changes the structure of one of the sides to make the epoxy bind better. The flame-treated side should always go on the inside of your board!
- Once you have your template, glue it flat to a piece of template wood and cut it out as precisely as possible. I would recommend doing a rough cut first, and then going back and slowly adjusting the fine details. This part of the process is incredibly important, as this template wood is defining the final shape of your board. If you mess up, start over! It’s not worth a crooked board to try and use an imperfect template.
- Once your template is cut from the wood, you can clamp the base material to the wood and start cutting with the router. Use the flush-cut trump bit on the router for this process, as it will create an exact cut for you automatically. If you don’t have a router, you can cut your base material manually with a sharp knife. If you have to do this, take your time and go slowly!
Step 2: Attach the Steel Edges
Next, you will bend and attach your steel edges to the base. Bending the edges is a time-consuming process, so be patient. Go slowly, and take meticulous care in attaching these pieces completely flush to your base.
- As you bend the metal, use clamps to hold the edges in place while you work. Superglue is your friend here, use it to keep everything exactly in place and prevent it from shifting. Always use gloves during this process to protect your hands!
Step 3: Construct the Core
The core is made out of vertically laminated strips of whatever wood you chose for your board. To create the core itself:
- Slice your wood into thin strips and attach them using wood glue.
- Once you have your flat sheet of wood, use your template wood from before to cut your core into the correct shape. This is accomplished much easier with the router. Without the router, you will have to do this by hand.
- When cutting your core, leave a little bit of excess off of each of the ends. This will make profiling the core much easier.
Take some time at this point to mark some important spots on your board on the core:
- Mark the center of your board, where it is at its thickest.
- Mark the ends of your board. If you have an asymmetrical board where the front and back ends look different, mark that very clearly as well.
- Mark where your binding inserts will go.
Step 3B: Drill Holes for Your Inserts
During this step is when you will drill holes for your inserts. Your design template should show you the exact locations on the core where your inserts will be.
Drilling the holes for the inserts requires some extra guidance - that's where Good Roads comes in - their instructions are killer for this part of making a snowboard. Just click this link to see the video from their YouTube channel on how to drill holes for your inserts.
Step 4: Attach the Sidewalls
This is the time to glue on your sidewalls. For homemade construction, I highly recommend using hardwood sidewalls.
P-TEX sidewalls won't easily bind to the wood of the core and are much more likely to rip off in future steps. Hardwood can be bought at any local department store.
- Trim the sidewalls to the correct size.
- Use wood glue to attach them to each side of your board.
- If you're using P-TEX to tipfill the ends of your board, you should cut the hardwood to stop at the point that your tipfill will start.
- Use clamps to hold them in place while the wood glue dries.
Step 5: Profiling Your Snowboard
Once you have the proper shape and your sidewalls attached, you will need to profile the core, AKA adjusting its thickness. This is when you want to get to that ~7mm center thickness and the ~2.5mm ends (these exact numbers will vary based on your board design. Profiling the board is made much-much-much easier with a router.
To keep your core from moving around, you can use hot glue around the edges as a sort of bumper to keep it in place. The router will slide back and forth over the core, rising and falling with the height of the rails, trimming the board to the proper thickness.
- Lay your board completely flat on the table.
- Adjust the router rails so it glides over your core at the correct thickness levels.
There are many other ways to profile your board, however, using a router is by far the easiest and most recommended.
Step 6: Apply Your Topsheet
The topsheet is the most easily customized part of your board! This is where you can let your creativity shine.
You can order a printed topsheet from websites like snowboardmaterials.com, or you can print your design yourself on a sheet of plastic or rice paper.
- If using rice paper, lay it flat underneath a clear sheet of plastic or fiberglass in your snowboard sandwich. The rice paper will be almost invisible in the final construction of the board.
- Make sure you use your wood template to trim your topsheet to the correct shape!
Step 7: Layup Your Board
This is the most exciting (and stressful) part of the entire build! The layup is when you build your sandwich - essentially the assembly of everything you've created to this point.
Now that you have all of your pieces, it's time to build your sandwich. This process involves putting your pieces together in the correct order, with epoxy layered between them to bind them all together.
The layers are as follows:
- Releasing Agent: This is typically some sort of wax used to prevent the base from sticking to your work surface on top of your mold.
- Base and Edges
- VDS Rubber: This is the rubber that goes on top of your edges that aids in the bonding process
- Fiberglass
- Core (and tipfill, if you chose to go that route)
- Fiberglass
- Topsheet
If you are using the vacuum method (which I highly suggest) there are a few more layers:
- Peel Ply
- Breather Fabric
- Vacuum Bag
Prepare as Much as Possible Before the Layup
Since the layup must be done promptly once you begin, it's important to do as much prep work as possible. Here are the absolutely essential steps in preparation:
- Glue two of your insert pieces to your base, on the inside-facing side. This way, when you lay the core down on top of your base, it will slide onto the inserts and keep it solidly aligned with the rest of the construction. The best way to do this is to pick two holes that are as far away from each other as possible. This will minimize the sliding. Make sure you also have pre-cut holes in your fiberglass layer that will go between your base and core!
- Attach your vacuum tape to the mold before you even start.
- Wear multiple pairs of gloves. Epoxy is very toxic. Make sure you are wearing nitrile gloves, as latex does nothing to stop the epoxy. Don’t be afraid to change gloves throughout the process if you feel they are too wet.
- Stack all of your materials in reverse order beside your work surface, that way you can’t forget anything.
Go On Then - Lay it Up!
The process itself from this point on is hard to mess up:
- Lay down your releasing agent.
- Mix your epoxy. (Mix well!)
- Place down your base and align it with your mold.
- Layer epoxy on the base in an even coat.
- Add some epoxy to your VDS rubber and apply it to the edges.
- Add your fiberglass layer.
- More epoxy.
- Add the core, making sure it is lined up with your insert guides.
- Epoxy.
- Fiberglass
- Epoxy
- Topsheet
Then, if you are doing the vacuum method:
- Peel Ply
- Breather Film
- Vacuum Bag
Make sure you seal the vacuum bag completely with tape all the way around.
Step 8: Press The Snowboard
Now attach your vacuum pump and let it run! Typically, this process will take 24 hours.
Once the waiting is done, you can handle your board, but don’t bend it!
Epoxy takes a week to fully cure and bending the board before this process is complete risks separating the layers.
Step 9: Finishing Your Snowboard Build
Once the epoxy has cured, you can take your board out of the mold.
- The fiberglass will need to be trimmed off, as well as any other portions of the board that aren't properly aligned. A jigsaw will be your best friend during this part of the process.
- After cutting your board to its proper shape, make sure you sand down the edges until they are smooth.
- After, you will need to take your board to a snowboarding shop and get a base grind. This will allow the wax to adhere to the bottom of your board.
Step 10: Shred!
You’re done! Now you have a handmade product that you can enjoy on the slopes.
Test out your board and see what you would change next time around! Maybe a new color, a different shape, or a smoother process (in hindsight that was my biggest takeaway for the next one I build.) I hope this guide has been helpful in your DIY journey.
There’s nothing better than the pride that comes with a custom, personal piece of sports equipment. And the best is still to come!