Most people start asking about how to mount snowboard bindings after they've purchased a second snowboard. They've got a few seasons under their belts, but their first snowboard wore down and needed to be replaced. So now they're leveling up - board, bindings, and all. If this sounds like you, clearly you're not alone in asking how to mount bindings to a snowboard.
Here’s how to mount snowboard bindings:
- Use the right tools
- Know your mounting pattern and binding interface
- Choose your binding type
- Differentiate between left and right bindings
- Select binding distance and angle
- Mount the front bindings
- Mount the rear bindings
It might seem like that many bullet points mean mounting snowboard bindings is simple, but it can be a bit tricky, especially for the uninitiated. This guide will introduce you to the types of bindings, the proper binding angle, and all the other binding basics so you can mount yours like a pro.
How To Mount Snowboard Bindings in 7 Steps
We’re going to throw a lot of information and steps at you in this section so that even if this is your first time mounting snowboard bindings, it'll be easy to figure out what goes where. Are you ready to get started? Great, let's go!
Step 1 – Gather Your Tools
Although there are quite a few things to do before you start mounting the bindings, it’s best to gather your supplies now.
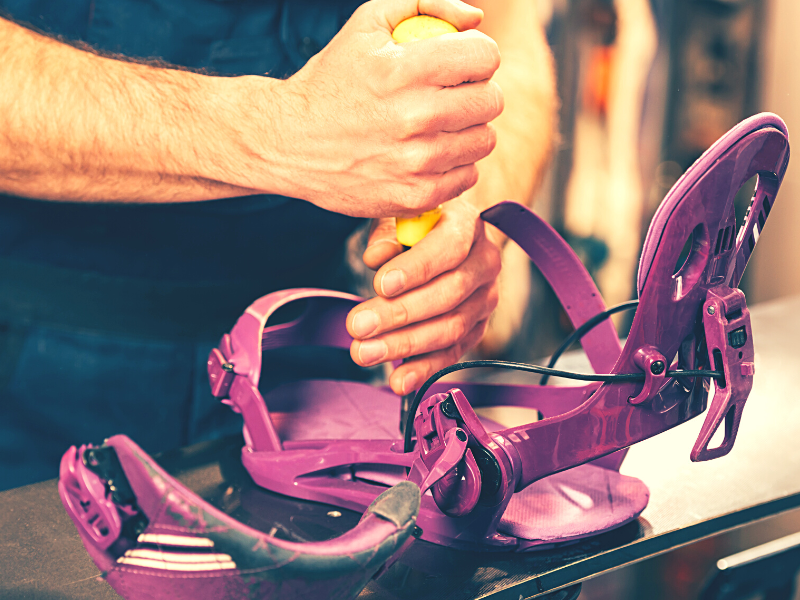
You don’t need many tools to mount snowboard bindings, usually just a wrench and a #3 Philips screwdriver. If you’d rather use a multitool for the job, that can be useful as well.
As long as your multitool has wrenches and flathead screwdrivers built in, then it will work just fine.
Step 2 – Know Your Mounting Pattern and Binding Interface
Snowboard mounting systems include one of several hole patterns or mounting patterns. To select bindings that are compatible with your board, you need to know which pattern it uses.
Not to further complicate things, but the binding interfaces vary as well - they’ll be compatible only with specific types of hole patterns.
We know, this can be a little confusing for someone new to snowboarding or mounting altogether. So let’s begin by talking about the mounting patterns first, then we'll walk through binding interfaces.
Hole Patterns You'll Come Across:
- 2x4: One of the two most common mounting patterns is 2x4. This mounting pattern refers to the distance in centimeters between holes. You’ll see two rows of holes on the snowboard. The holes are spaced approximately two centimeters from one another, and the rows are four centimeters apart; you can see it easily in this K2 First Lite. There can be six holes per row or up to eight. Unless you own a Burton snowboard, then you're likely to have a 2x4 mounting pattern.
- 4x4: If not a 2x4 mounting pattern, then your snowboard might have the 4x4 pattern instead. A 4x4 mounting pattern is comprised of fewer holes than a 2x4. There are two rows of six holes per row. Each hole is four centimeters from the other and each row is four centimeters apart as well. If you have a specialty or youth snowboard, then you might see the 4x4 mounting pattern, but it’s largely been done away with in favor of the 2x4 pattern. Older boards could have a 4x4 pattern as well.
- 3D: Some Burton snowboards feature the 3D mounting pattern, which is more complex still. Rather than rows, the holes are arranged into triangle-like configurations. Each configuration has eight holes. You can use three screws for mounting snowboard bindings with this hole pattern. The 3D pattern is only seen in older Burton boards from before 2014.
- The Channel: I swear this article isn't an ad for Burton, but since they are popular, it's worth showing the options out there. It just so happens that they've innovated in this area. So of course, here comes the Channel Mounting Pattern, which Burton boards post-2014 will feature. The Channel has no holes at all but rather two slots. Both slots are positioned so they’re parallel to the board’s edges. You only need two screws to attach each binding, and you have the freedom to adjust the degree of setback, centering angle, and stance width using The Channel.
Let's Talk Binding Interfaces:
This will allow you to find a compatible binding interface based on the mounting pattern. You can choose from four interfaces.
- 4x4 baseplate: The first binding interface is the most frequently used, and that’s the 4x4 baseplate. If your snowboard has The Channel, 2x4, or 4x4 mounting patterns, then it’s compatible with a 4x4 baseplate. The baseplate on the Ride A-4 for instance is compatible with Channel, 2x4, and 4x4.
- 3D baseplate: If yours is a Burton snowboard that uses the 3D mounting pattern, then you need a 3D baseplate to match.
- EST baseplate: The Extra Sensory Technology or EST baseplate is another Burton-exclusive binding interface. You can only use this baseplate if your Burton board uses The Channel mounting pattern.
- Re:Flex baseplate: The last binding interface is the Re:Flex baseplate. This is yet a third Burton-only baseplate that’s more versatile than the EST plate. You can use a Re:Flex baseplate on The Channel, 2x4, or 3D mounting patterns but not 4x4 mounting patterns.
Step 3 – Know Your Binding Type: Entry Systems
The next step of the process is selecting the type of binding you’ll mount to your snowboard.
Here’s what you need to know about each type of snowboard binding.
- Step-on bindings: Step-on bindings such as the K2 Clicker Bindings or the Burton Step On Bindings are only compatible with Burton Step On boots. If you have those boots in your collection, then these bindings are ultra-convenient. All you have to do is slide your feet in and lock your heel to the binding. Then you’re ready to ride!
- Rear-entry bindings: You can easily discern rear-entry bindings from other types thanks to the toe’s single strap and the tall, reinforced back of these bindings. That back, which is also referred to as a highback, opens up so you can put your foot in. Then you lock the highback and you’re good to go.
- Strap-in bindings: Of the three types of bindings, the one you’ll come across the most often is the strap-in binding. You insert your foot, adjust the straps until your boot feels tight in the binding, and you’re ready to hit the slopes. The K2 Indy Snowboard Bindings are a good example of this style. Easy!
Step 4 – Differentiate Between Left and Right Bindings
You can easily determine which is your left boot versus your right boot but telling the difference between left and right snowboard bindings can be surprisingly tough for beginners.
You have two methods of differentiation to use. First, allow the straps to serve as your guide, following their direction. If that doesn’t work, then review the curve of the binding.
Just like a shoe has a curve to denote either the left or right foot, the binding should be as well.
Only one of your feet needs to be at the front of the snowboard, and that foot is known as your lead foot.
You don’t need your snowboard to determine your lead foot. Just stand still on any flat surface like your living room floor or outside. Slowly begin to fall forward but don’t let yourself fall to the ground.
Which foot did you use to prevent your fall? That’s your lead foot. A right-foot stance is known as goofy while a left-foot stance is regular.
Step 5 – Select the Binding Angle and Distance
Although you know which binding is the left and which is the right, you still can’t get started with mounting the bindings yet. Before you do, you have to select how far apart the bindings will be as well as at which angle.
Binding Angles 101
Depending on your experience level and the style of snowboarding you prefer, you can choose from several unique binding angles. Here’s an explanation of each.
- Beginner stance angle: If you’re a beginner, then the best stance for you is the duck stance. Both feet should be angled opposite of one another. Your front binding may be at an approximate angle of 15 degrees while the rear binding is anywhere from -6 to 0 degrees. In the duck stance, you get better weight distribution so you feel surer on your snowboard.
- Freeride stance angle: Freeriding and freestyling are two different things. With freeriding, you don’t use obstacles for stunts and tricks, but rather the natural terrain of the slopes. This calls for a forward-facing stance with your lead foot at an angle of 21 degrees and the other foot at an angle of 6 degrees. You can also do 18/6 or 18/3.
- All-mountain stance angle: All-mountain snowboarding utilizes more mountainous terrain, including the backcountry. Leaning slightly forward or even doing a moderate duck stance suits all-mountain snowboarding well. The lead foot should be at an angle of 18 degrees and the other foot will be at - 6 degrees. Other options are 15/-6, 18/-3, or 15/-3.
- Freestyle stance angle: Are you a freestyler? The mirrored duck stance is the most compatible with freestyling, with one foot at an angle of 15 degrees and the other foot at an angle of -15 degrees. You could always try 18/-12, 18/-9, 15/-9, or 15/-6 as well.
Next, it’s time to select your stance width.
Stance Width
Check your snowboard, as it likely contains markings for the center-mount screw holes. Your left and right foot can right over those screw holes as well as one entire foot’s distance to the left or right of the holes.
Don’t forget to set your stance offset as well. The closer to the middle of the board you are when mounting your bindings, the simpler it will be for you to turn and feel in control of your board.
Some riders, especially the more experienced ones, like to use setback, which means mounting the bindings nearer the board’s tail. This increases flotation when boarding in powdery snow and improved turning "aggression."
Step 6 – Mount the Front Bindings
Okay, you’re finally ready to begin mounting. Start with the front bindings and then work your way to the back. How you’ll mount the front bindings varies whether yours are Burton EST bindings or disc bindings.
We'll look at the steps involved with each, starting with Burton EST bindings.
For Burton EST Bindings Only
- Take your #3 Philips screwdriver and slip the Channel plug from the Channel binding nearest the front of the board. It should pop right out.
- Find the included Channel inserts and slot those into the Channel openings. Then put the plug back.
- With your lead foot binding in hand, insert the binding into the Channel inserts.
- Pick up your screwdriver again and use it to tighten the screws for each insert. Keep the screws loose enough so you can slide your front binding.
- Set your stance and then angle the binding so its default position is an angle of 15 degrees. A stance indicator window will help with this.
- When you’re in the right position, tighten the loose screws all the way.
For Disc Bindings Only
- Take your left or right binding and its accompanying disc and set the binding angle how you want it.
- Put both bindings close to their final positions, then place the disc atop the middle screw holes. The bindings should be positioned in such a way that from your boot heel to your boot toe, there’s an equal amount of snowboard on both sides.
- With a #3 Philips screwdriver, begin turning one screw at a time and keep them loose.
- Once the binding is in the correct position, you’re free to tighten up all the screws. Of course, don’t tighten the screws too much or you could strip them.
Step 7 – Mount the Rear Bindings
Now that you know how to mount the front bindings, be those disc bindings or EST bindings, it’s very simple to repeat those steps for the rear bindings.
The rear binding should be at an angle of -6 degrees, so the binding is angled backward.
You Can Mount Snowboard Bindings, Even Though It's Tricky
Mounting snowboard bindings is admittedly a challenging task, especially for beginners. Just like waxing a snowboard, or anything you try for the first time, the more you do it, the easier it will become.
Fortunately, once you’ve got your bindings in a place where you like them, they will last for three to four years (typically longer than most snowboards) before you’ll have to think about replacing and mounting them again.
Practice will make perfect when it comes to mounting your snowboard bindings. So get this first one underway, and soon you can show all your buddies how it’s done.


