It doesn't take long to go from "first-time skier" to "fanatic." That was my experience at least, and I quickly went from renting to owning a pair of skis. After a fair amount of use, the time hit when they needed waxing, but I didn't know all the signs as I do now. So if you're wondering when your first pair of skis need a new coat of wax, you've come to the right place.
You can tell if your skis need wax in the following ways:
· You feel slower when skiing
· The skis feel noticeably dry
· The skis look discolored
This guide will serve as your go-to reference for waxing skis. We'll provide key information, like how long wax usually lasts on skis, how to tell when it's time to sharpen them, and the best way to apply ski wax.
How Long Does Wax Last on Skis?
The most ardent skiers will notice that a layer of wax lasts about three days. If you ski a little less frequently, you could get away with having to reapply ski wax every five days, but no more infrequently than that.
That said, the longevity of your ski wax depends very much on the type you use. Rub-on wax lasts the least amount of time while hot waxes last longer.
If you’ve read the Kenver series on snowboard wax, then you’ll recall how that wax doesn’t last for too many uses. It’s much the same case with ski wax.
Later on in this article, we’ll get an overview of each type of ski wax you can use, so make sure you keep reading for that.
Now then, let's look closer into the 3 signs you need to wax your skis.
3 Signs You Should Wax Your Skis
You might get a few days, or you might get a week on the slopes before your skis need waxing, but if you aren't in the business of counting days, here are three watch-outs that can be an early indicator to bust out the wax.
1. You Feel Slow When Skiing
Has nothing about your skiing technique changed yet you still feel like you’re moving like molasses down the slopes? Has this happened more than once, especially recently?
If so, then instead of nitpicking your technique, you might want to try waxing your skis first.
Freshly-waxed skis can glide easily on the snow, which in turn augments your speed and performance. You’ll feel anything but sluggish.
2. The Skis Feel Dry to the Touch
Another indicator that your skis could use a fresh layer of wax is in their feel. If you’ve owned your skis for a while, then you’ll be keenly aware of how they normally feel. When the skis feel different, you should be able to tell right away.
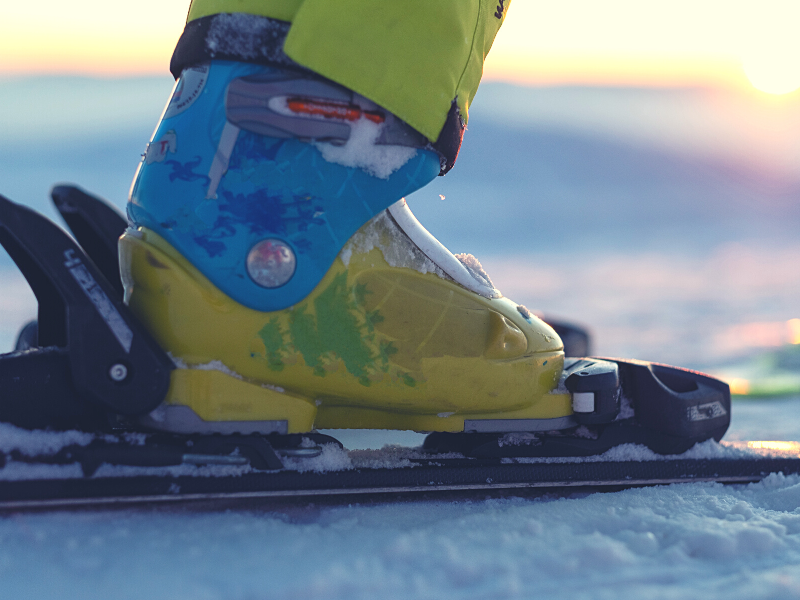
Waxed skis look glossy and feel slick and hydrated. Unwaxed skis lack that hydration and feel bone-dry. The texture can also be slightly rough.
Once you wax your skis again, they’ll look and feel great.
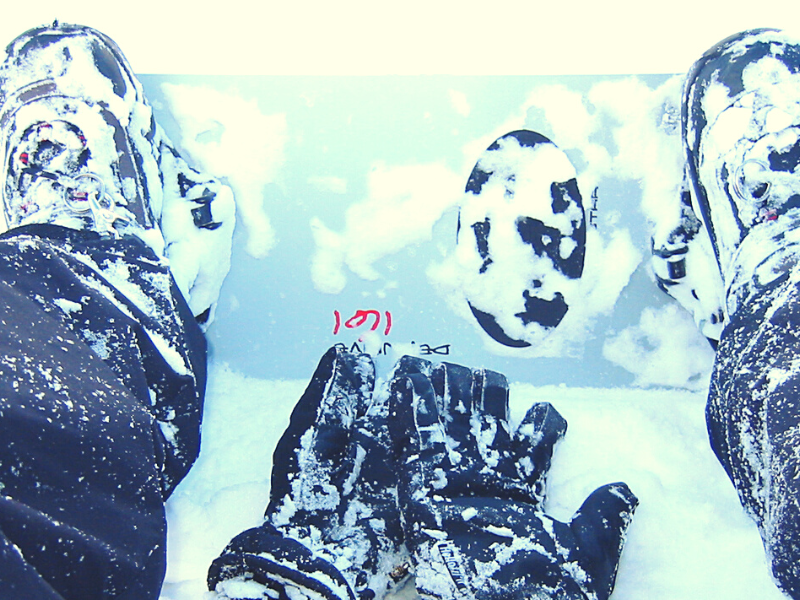
3. The Skis Are Discolored
Does the base color of your skis look a little different these days? At first, you might assume that you somehow damaged the skis and caused a layer of color to come off, but that’s not what’s going on here.
Rather, the wax layer has been completely stripped through time and use, and that’s why the skis look discolored.
The discoloration might take on a whiteish appearance with a chalk-like texture.
On black skis, it’s impossible to miss such an obvious sign that your skis need more wax. Colored skis might not have the same chalky imprint, although they can. Additionally, look for overall color fading and a reduction in vibrancy.
How to Wax Skis
You know the tells for when it's time to wax your skis, but does that mean you have to take your skis to a local shop to get waxed? Not at all - waxing skis isn't a difficult task. It does require some supplies, and a semi-lengthy number of steps, but it isn't complicated.
If you’ve waxed a snowboard before, it’s not too different when doing the same with skis.
Here are the steps to follow.
Step 1 – Gather Your Supplies
To make waxing the skis a smooth process, you need these tools:
· Brush
· Ski wax
· Ski vise
· Metal file
· Plastic scraper
· Waxing iron
· Rubbing alcohol
· Rag
Step 2 – Select Your Wax
All ski wax is not the same, and you shouldn’t select one randomly. As promised, here’s an overview of the various types of ski wax.
1. Eco-Friendly Wax
Some types of waxes, as you’ll see shortly, are not exactly doing any favors for the planet.
To negate the damaging effects of ski wax, manufacturers have made the jump to eco-friendly wax.
Rather than use fluorinated or petroleum ingredients, eco-friendly waxes are plant-based.
2. Fluorocarbon Wax
The next type of ski wax is fluorocarbon wax, which is–as the name suggests–comprised of fluorocarbons. Fluorocarbons are used in ski wax because they’re excellent at repelling water.
While fluorocarbon-based wax delivers performance upgrades, it’s regarded as one of the more expensive types of ski wax.
The level of fluorination in ski wax varies depending on the product you purchase.
For example, low fluorocarbon wax contains some fluorocarbons, but not as many as in other formulas. You’ll get a slight performance enhancement with this type of wax.
Skiers who use low fluorocarbon wax usually do so in conjunction with another type of wax, with the low fluorocarbon wax merely a base.
High fluorocarbon wax works optimally in dirty and wet snow, especially of the manmade variety.
You don’t lose any ski glide, which explains why high fluorocarbon wax is the costliest of the three types.
The third type of fluorocarbon ski wax is pure fluorocarbon wax. Lasting longer than most types of fluorocarbon wax, the dirt-repelling properties are why this wax is so preferable among skiers.
Pure fluorocarbon wax is typically used to wax a board before riding.
3. Hydrocarbon Wax
Hydrocarbon wax is a common type of ski wax on the market. Made primarily with paraffin, hydrocarbon wax has one of two application methods.
For a very quick waxing job, you can always rub on hydrocarbon wax. This delivers the shortest-lasting results, as the wax may stick for upwards of a day.
You can also melt the wax and apply it on your skis that way, which produces more wax longevity. That said, you will still have to reapply the wax after several days.
4. Temperature-Specific Wax
Although you ski in cold conditions, not all cold conditions are the same.
Temperature-specific wax fills in those gaps, allowing you to choose a type of wax that matches your environment by the day.
You will have to become privy to factors such as air humidity, air temperature, snow condition and age, and snow temperature to choose the right temperature-specific ski wax.
Let’s go over each of these factors now.
- Air Humidity: Humidity is a measure of how much moisture is in the air. Although you usually feel the humidity in the summer, humidity can linger in the wintry air as well, just not nearly to the same degree. As winter begins to give way to spring, humidity levels can start to rise.
- Air Temperature: The air temperature is simply a reading of what the outdoor temperature is in Fahrenheit or Celsius. It does not measure the amount of moisture, only how hot or cold it is.
- Snow Condition and Age: The condition of snow refers to its type. For instance, snow can be dry and powdery or wet, heavy, and packed. Determining the age of snow isn’t like cutting a tree and counting its rings. You’d need to know when the snow fell and determine how long the snow has stuck around based on factors like air temperature and air humidity.
- Snow Temperature: Like the air has its separate temperature, the same is true of snow. The ski resort might have this information for you if you ask.
5. All-Temperature Wax
The last type of ski wax is all-temperature wax. As the name implies, you can safely rely on this wax regardless of factors such as snow temperature and air temperature. It’s designed for a variety of temperatures, whether you’re having a frigid cold winter or a mild one.
This is a great wax if you aren't sure of temperatures or conditions - hard to go wrong with this one.
Step 3 – Put on the Ski Vise
We highly recommend a ski vise for waxing skis, especially compared to waxing a snowboard.
Skis are far skinnier and are harder to handle. The vise will keep them in one place to ensure your wax isn’t wasted.
You can’t simply insert a vise onto skis:
- First, you need to retract your ski brakes. That should be as easy as applying pressure to the pedal.
- When you press on the pedal, the brake arms will lift and should be parallel to the rest of the ski.
Next, take an unused thick rubber band and connect it from the heelpiece (over the top) to the opposite ski arm to ensure the brakes don’t move out of position.
- Now turn your skis so the base side is up and then lock the vise around the skis.
Step 4 – Clean the Skis
Ski wax best adheres to freshly cleaned skis, so that’s the next order of business. You won't need any specialized cleaners for your skis, only rubbing alcohol. Pour the solution onto a rag and wipe down both sides of the skis.
The rubbing alcohol will lift debris and dust from the surface. A wire brush gets deeper into crevices if your skis are especially dirty. Give the rubbing alcohol ample time to dry on the skis; there’s no need to rinse it away with water.
The alcohol should be dry in upwards of 20 minutes.
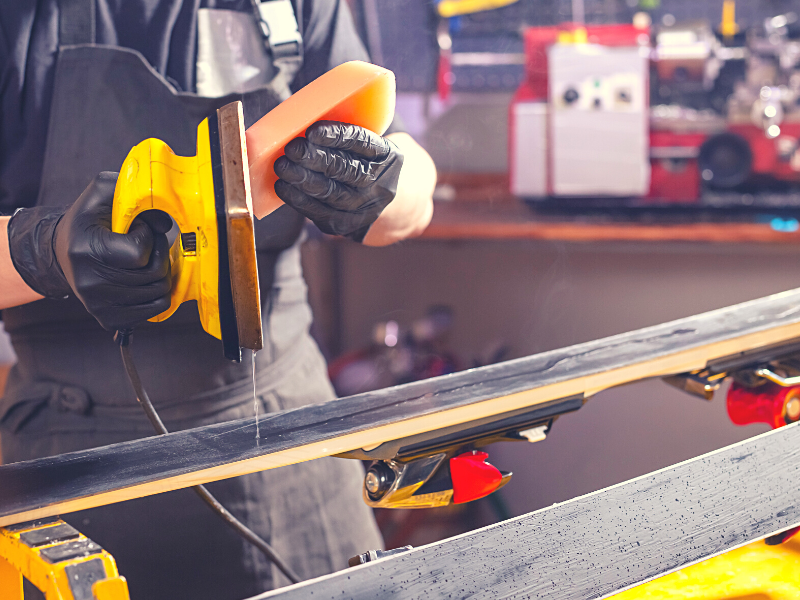
Step 5 – Wax the Snowboard
Now it’s time to use your waxing iron - if you read the Kenver guide to waxing a snowboard, this will look and sound familiar.
A waxing iron is a different beast compared to a clothes iron. We do not advise you to use the two interchangeably. The temperature differential is too much.
A clothes iron doesn’t always stay at a consistent temperature, whereas with a waxing iron, that’s exactly what it does.
That said, you will have to adjust the settings to find the right temperature. The recommended iron temperature might be in your waxing iron’s instruction manual or on the box of ski wax.
The colder or harder the wax, the hotter the waxing iron needs to be. The warmer and softer the wax, the lower the temperature should be. Here's how you'll get started:
- Take one piece of ski wax, a good-sized chunk of the stuff, and hold it near the waxing iron. Take care to avoid getting your hands too close to the iron. The wax will begin melting right away onto the skis, which are still locked in the vise.
- Keep the wax between two and four inches over the skis and move the waxing iron to coat the entire ski.
- You can also use the iron to spread the wax if you wish, which is handy considering how long a ski can be.
One tip is to apply only a thin layer of wax and keep that thickness consistent across the ski. Don’t be afraid to go back and double down on areas that are a little dry.
It's also a good idea to keep moving the waxing iron. If you leave the iron in one spot for too long, you could damage the ski.
Step 6 – Allow the Wax to Dry
Now that you’ve waxed your skis, the wax needs time to come to room temperature and harden up. The dry time should be printed on the wax instructions. If not, then the rule of thumb is to wait at least an hour.
Step 7 – Scrape the Excess Wax Off the Skis
To ensure the layer of wax is consistent from top to bottom, next, you'll need to scrape away any excess wax on the skis.
For this job, you’ll need a scraper. A plastic scraper is always recommended over a metal scraper, as the latter can gouge and otherwise damage your skis.
To start, run the plastic scraper down the length of the skis, or about midway down if that’s easier (you can do the second half after). Keep your movements consistent and overlap your strokes.
Can you see any wax? If not, can you feel it? Then congratulations, you’ve sufficiently removed the excess wax from your skis.
Step 8 – Brush the Skis
The last part of the waxing process is brushing your newly-waxed skis using a nylon brush.
Brushing lends the base of the skis more texture for even better handling in the snow.
Holding the brush firmly, start from the top of the ski and brush to the bottom. This should take you upwards of 20 strokes to complete.
How Often Should You Sharpen Skis?
Besides the smoothness of your skis, you also have to concern yourself with their sharpness.
Skis cut into the snow and allow you to evenly glide across the surface. When they dull, you might struggle to ski as effortlessly as you once did.
More so, the burrs that can develop on the edges of the skis can also foster rust. If your skis rust enough, you might have to retire them prematurely.
It’s a good idea to sharpen your skis with a handheld file at least every two days between the last time you skied and the next.
You should also consider getting your skis professionally sharpened at least once a year. A professional will have access to more sophisticated tools, allowing them to sharpen your skis practically back to factory-perfect conditions.
Some situations warrant twice-per-year professional ski sharpening. Avid skiers who hit the slopes for more than two consecutive weeks of skiing time per year are good candidates for more frequent sharpening.
The type of snow you ski on also plays a role in how much time you’ll go between one sharpening session and another (these being your own at-home ski sharpening efforts with a handheld file).
If you prefer powdery, soft snow, or if that type of snow is most prevalent in your area, then your ski edges won’t wear down quite as rapidly. You can go a bit longer between sharpening.
In hard-packed snow, wet snow, or snow mixed with ice, conditions are a lot harder on your skis. Here in the Northeast US, wet snow is the name of the game. So sharpening skis is a must-have. You won’t want to wait for more than one ski session before you sharpen up the skis for the next ride.
You Now Know When And How To Wax Your Skis
Your skis need waxing frequently, about once every use or at least after every few uses depending on how much you use the skis and what kind of snow you’re riding in.
Now that you know how to choose the right ski wax and how to wax your skis, you can keep up with this part of ski maintenance rather easily!